


Water distribution tube?
Going through the cooling system in a 1935 Plymouth
By Mike Bade
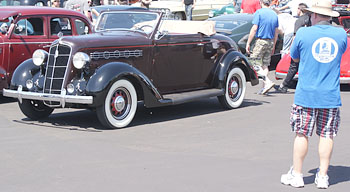 It didn’t take long driving my “new” ’35 Plymouth Convertible to realize it had a major overheating problem. Starting with simple, cheap and easy stuff, I tried replacing the thermostat. That wasn’t it. A radiator/system flush didn’t help either.
Part: 1
Next was to pull the radiator. To remove the hood was not too big of a deal, looking at the radiator I was not to sure how I was going to attack it. I decided to call Dave Pollack, a CPPC member from Canada, who owns a 1935 Plymouth, to give me a little courage to dive into the whole, radiator thing. Dave gave me a direction to continue with the project and after talking with him it seemed really straight forward.
Click on the picture or follow this link to see pictures of the process.
You just need to pull the radiator fan and pulley; all in a very confined space. I also learned a trick to take off the radiator braces that go to the firewall, which makes things easier. Loosen the bolts on the end next to the firewall first, so you have a less tension on the screws on the radiator end. If you don’t it will be very hard putting back together.
Remove all the screws on the side of the radiator and if you have a helper to guide the radiator by everything you are done.
Taking the radiator to get it tested was the next step. After a flow test I was told it was 80% blocked and my options were get a new core or I could try running muriatic acid through it 50% muriatic acid and 50% water for a few hours at a time.
So I headed to the hardware store to get some. The guy from the radiator shop let me borrow rubber plugs to plug off the top and bottom of the radiator. I put on gloves and mixed things together and poured it in and waited. I would occasionally tap on the outside of the of the radiator and even jostled it back and forth and even upside down.
I would use four batches of muriatic acid, with a rinse in-between. Each time I rinsed I could see interesting things floating out, sand , black chunks, even white stuff. Where the heck does white stuff come from? So I was optimistic that I was making headway.
I took the radiator back to the guy for a reverse flush. A couple of days later I went to pick it up and he said that there was no back pressure, meaning it was OK, the muriatic acid must have worked.
Part 2:
I had heard that there was a water distribution tube behind the water pump, that often needs replacing, as it rusts away over time from being exposed to water, antifreeze etc.
I found the name of a company called Vintage Power Wagons in Fairfield, Iowa (1-641-472-4665) and was able to order the water distribution tube and the tool recommended to help remove it.
I also ordered a new gasket set from Olsen Gasket in Washington so I would have new gaskets to put it all together with.
The water pump is not hard to get to but not much room to loose bolts and persuade it without doing any damage. Of course everything is grungy and rusty so it will all have to be made pretty again be fore reinstalling, just part of the job.
Next it was not going to be easy to pull the water extension tube out unless I removed the chrome grill. It would have been easy, if the person before me had not used the wrong nuts and bolts, which were wedged in behind other things. Don’t you had it when that happens, it took a couple hours of trying this and that to take out two screws, eventually had to get the grinder out and grind away the bolt and nut.
When you look at the water distribution tube it really does not even look like it is even in there. When the new tube and tool arrived, it has a hook that catches on the top side of the old tube and you have to pull as hard as you can. Some people us a slide hammer, as there is a place on the end to thread in a bolt to do so. After a little whacking and pulling I it finally began to come out. Once I had enough to hook onto with a vise grip I hooked on to it and finally got it out and fortunately in one piece, what there was left of it.
Yes there was not a lot left, there was white cloth-like material clogging it. It was a good thing I had taken the time to pull the old tube out. Even if the old one would not have been as bad I was going to put the new one in.
I put the new distribution tube in, and then slowly cleaned and painted all the parts, installed the gaskets, installed the grill, then the radiator, etc. without too much incident.
I held my breath when I put water in it and it held water and then we started the engine to see how much of a difference all my work had made.
I drove the ’35 for a good distance and and watched the temp gauge and as it warmed up the temperature stopped at 150 degrees pretty much, I had solved the problem.
We have taken the ’35 to Papa’s Toys car show and Hazel Del Parade, taken short trips and still the temperature stays around 150 degrees. What a relief to have the car running and not worry about hurting the engine or getting stranded some where.
Hope this will give someone else out there the confidence to try this for an overheading problem with their Plymouth.
Mike Bade,
Happy Valley, OR