
Enlarging the back window on a
1935 Plymouth Convertible
By Mike Bade
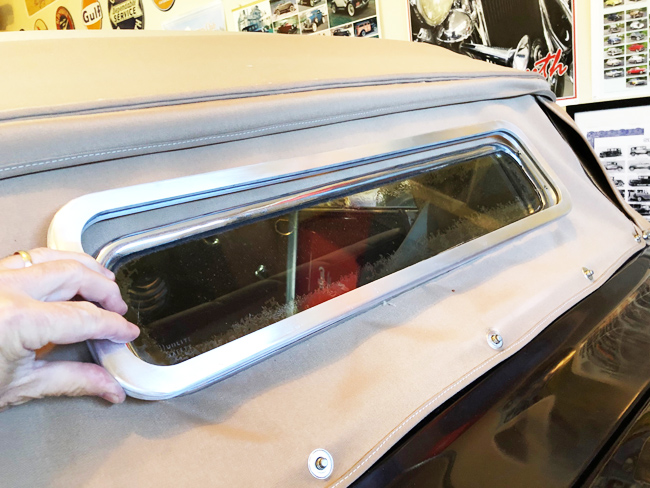
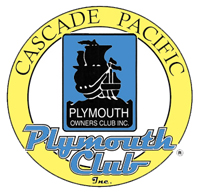
If you have a mid 30's convertible and tried to drive with the top up, you know that it is really hard to see out the view mirror thought the convertibles rear window, with the top up. If you have someone with you to help check for traffic it is a little easier.
 I decided that I was going to replace the rear window on my '35 Plymouth Convertible. I checked online to see if I could find a larger rear window frame, but not much to find. The ones I found were not any bigger.
I thought about modifying the original frame, but then I would be without a back window for as long as it takes to modify the original.
I have had several things laser cut for my other cars before and this seemed like another opportunity to do so. I wanted the a two inch taller window frame, to be able see out better.
I used one of my graphics programs to design what I wanted to have made.
First, I measured the original window frame and added two inches to the height. I used the program to measure out he size, radius and hole spacing for the mounting screws.
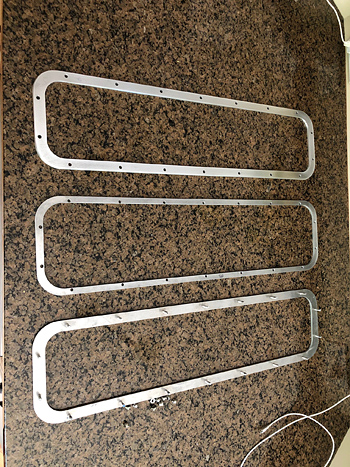 There are three pieces to the window frame: Outside, inside and a smaller spacer in-between to hold the glass.
Once, I had the basic frame drawn in the computer, with the spacing to the mounting screws, with their correct diameter, I could use it to make the other pieces. I copied it twice, modifying one for the spacer to accommodate the glass and the final one removing the mounting. The third one could go either way, depending the method of the mounting screws.
I had planned on using aluminum, for the rear window frame. Once cut out, I could use files and various grits sand paper to shape it to the finished shape. Once shaped then I would get to chrome painted. I found out you can't get aluminum chromed.
I printed out the design and put the digital file on a flash drive and took it to Versa Tech, a metal fabrication company off Airport Way, near the Portland Airport.
I took the digital file and print out in to get laser cut. I found out they could weld aluminum screws to the out side frame, so there would be no bolt holes showing from the outside, cool. I left it to have them work their magic. The guy could not give me a price at the time, just teasing that in wouldn't be more that a couple car tires.
I was given another option to have the frame cut out of mirror finish stainless steel, but I would not be able to put a small radius like I wanted, maybe for a future project.
When I went to pick up the finished window frames they came out as good as you could imagine. It all fit together perfect, whew! All I had to do was shape it to the finished shape.
I wanted to give the outside edge a little radius kind of like the original, right . . ., but I had never tried before.
I bought a couple new files and assortment of sandpapers in different grits and started the process of shaping the aluminum. It did not go as quickly as I had hoped, being careful not to be too aggressive.
I filed and sanded, then filed and sanded, I probably spent a good 4 hours total, to get it done. I was anxious to get it done, so I bailed on rounding the inside edge, I don't think people will notice, unless I told them.
I was going to try a grinder bit in a drill, but there is not control in case it jumped around. If I do it again, I would make some sort of jig to hold everything to do faster and see what other bits or grinders there are.
Holding the filled and sanded frames up to the old rear window, there will be a more room to see out of my new window frames, you tell me.
I took the frames over to Finish Line Industries in Newberg, OR where they will Cosmichrome them. Basically, they paint chrome paint which, looks very real, when you can't chrome things. I did the before with my fender skirt medallions and they came out perfect.
When I get the Cosmichromed Frames back, I will take them over to a place and have a Plexiglas window cut to fit.
Then I will cut out the old window and put in the new one. Probably will need some kind of silicone sealant to be sure it does not leak. There will be some details, if there are I will let you know.
Mike Bade - mdscbade@msn.com